
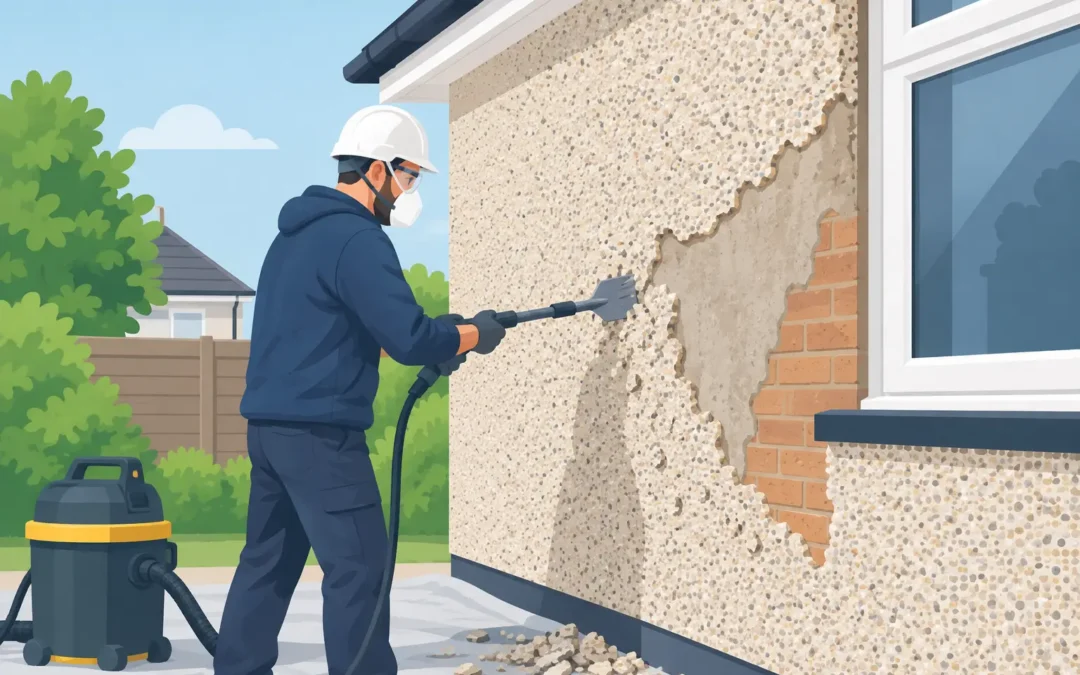
Pebbledash can make a property look tired long before it has actually failed. Loose stones, cracked patches and stained areas are frustrating, but knowing how to remove pebbledash safely matters more than simply getting it off the wall quickly. The finish is hard, heavy and often firmly bonded to the surface beneath, so careless removal can damage brickwork, create hazardous dust and leave a much bigger repair job.
For many homes, particularly older properties, removing pebbledash is a job best planned properly rather than tackled with a breaker and a spare weekend. The aim is not just to strip the old finish. It is to protect the building fabric and leave a sound surface ready for repair, new render or another suitable finish.
Decide whether removal is the right answer
Not every pebbledash wall needs to be stripped back. If the render is well bonded, dry and free from major cracking, a specialist may be able to repair local defects and apply a compatible new render system over it. This can reduce disruption, cost and the risk of disturbing fragile masonry.
Removal is usually the better option where the pebbledash is hollow, loose, heavily cracked or trapping moisture against the wall. It may also be necessary if previous repairs have been carried out with unsuitable hard cement, or if you want to expose and address damaged brickwork before modernising the exterior.
The age and construction of the property are central to that decision. Older solid-wall houses often have softer bricks and lime mortar, which can be damaged by aggressive mechanical removal. A wall that looks sturdy from the pavement may be more delicate once the outer finish comes away. Before any work starts, inspect for crumbling mortar, spalled brick faces, damp staining and movement cracks around windows and doors.
How to remove pebbledash safely before work begins
Safe removal begins with an assessment, not a tool. Look carefully at the condition of the render and identify what is behind it where possible. A small, discreet test area can reveal whether the pebbledash is sitting on sound backing render, bare brickwork, blockwork or an earlier coating.
If the building dates from before 2000, take extra care around old textured coatings, soffits, boards, insulation and other materials that may have been altered over the years. Pebbledash itself is not automatically an asbestos concern, but materials within or around the work area can be. Where there is any doubt, arrange suitable testing before disturbing them. Do not rely on appearance alone.
Access also needs proper thought. Working from ladders while using heavy tools is unsafe and makes it much harder to control falling debris. Scaffolding gives a stable platform, allows the wall to be covered where needed and helps keep the work controlled. For a full elevation, it is normally the sensible option.
Protect windows, doors, paths, drains, plants and neighbouring property before starting. Pebbledash does not fall neatly. Stones and render fragments can travel further than expected, and cement-based debris can stain glass, scratch painted surfaces and block gullies. Keep children, pets and anyone not involved in the work well away from the area.
Personal protective equipment should include safety boots, tough gloves, eye protection, hearing protection and suitable respiratory protection. Dust from mortar and render can contain respirable crystalline silica, which should not be breathed in. A disposable dust mask bought for occasional decorating is not enough for prolonged dusty removal work. Use appropriate face-fitted respiratory protection and keep dust suppression in place.
The safest method for removing pebbledash
The right method depends on how strongly the finish is bonded and what sits behind it. In most cases, controlled hand removal supported by light mechanical tools is safer than attacking the wall with a powerful breaker. Start at a small test patch, ideally in an unobtrusive location, to see how the render releases and whether the bricks or blocks are being damaged.
Begin from the top of the section being removed and work downwards. This reduces the chance of loose material dropping onto newly exposed areas and keeps the work zone easier to manage. A bolster chisel and club hammer can be effective for carefully lifting loose edges. If a power tool is required, use it sparingly and at a shallow angle to the wall rather than driving directly into the masonry.
Avoid angle grinders for general pebbledash removal. They generate a large amount of fine dust and can cut into brick faces or mortar joints very quickly. Likewise, a heavy-duty demolition hammer can be far too aggressive for older brickwork, even in experienced hands. Fast removal is rarely good value if it leaves every elevation needing extensive masonry repair.
Use a light water mist to control dust where conditions allow, but do not soak the wall. Excess water can create slurry, make access slippery and introduce unnecessary moisture into the building. The goal is damp dust suppression, not washing the render off. Electrical equipment must also be suitable for the working conditions and used with the correct safety precautions.
As the pebbledash comes away, stop regularly to assess the backing surface. If you find widespread loose brick faces, deep cracks, failed lintels or damp masonry, do not carry on as if it is only a cosmetic issue. Those defects should be repaired before a new finish is applied. Covering them with fresh render may hide the problem temporarily, but it will not solve it.
Treat the wall beneath with care
Once the old finish has been removed, the temptation is to make the wall look perfectly clean immediately. That can cause more harm than good. Small remnants of old backing render may be better left where they are sound and would take brick faces with them if chipped off.
Brush down loose material, rake out any failed mortar joints where necessary and allow the wall to dry. Masonry repairs should be compatible with the age and type of construction. On many traditional properties, a breathable lime-based repair mortar is more appropriate than a very hard cement mix. The wrong material can concentrate moisture in softer surrounding brickwork and lead to further deterioration.
This is also the point to investigate the cause of any staining or dampness. Check gutters, downpipes, overflowing hoppers, defective flashing and ground levels. New render will look its best and perform properly only when water is being directed away from the wall as it should be.
Plan the finish before you strip the wall
Removing pebbledash without a clear plan for the exposed wall can leave a property vulnerable to the weather, especially in Greater Manchester, Salford, Bolton and Bury where long wet spells are common. Ideally, the removal, repairs and new finish should be organised as one coordinated project.
The suitable finish depends on the wall, the property style and your priorities. A quality coloured render can provide a clean, modern appearance with less ongoing painting. For homes that would benefit from improved thermal performance, an external wall insulation system may be worth considering, subject to the property construction and detailing around roofs, windows and boundaries.
A new render system should never be selected on colour alone. It needs to suit the substrate, manage moisture correctly and be installed with the right preparation, beads, reinforcement and weather protection. A neat finish is important, but long-term adhesion and weather resistance are what keep it looking good.
Waste, neighbours and site cleanliness
Pebbledash removal creates a surprising volume of heavy waste. Keep rubble contained, clear it regularly and arrange disposal through a legitimate route. Do not overload a domestic wheelie bin or allow debris to collect around entrances and drains.
If your property is attached or close to neighbouring homes, speak to neighbours before work begins. Let them know the expected timing, scaffold arrangements and likely noise. This simple step can prevent understandable concerns, particularly where dust and falling material may affect shared access or parked cars.
A professional team should leave the site safe at the end of each day, with waste managed, access routes clear and exposed areas protected from rain. Cleanliness is not an extra. It is part of carrying out exterior work responsibly.
When to call in a rendering specialist
DIY removal may be realistic for a small, detached garden wall with a known sound substrate. It becomes far less straightforward on a house, above ground-floor level, near services, or where the masonry condition is uncertain. The cost of repairing damaged brickwork, replacing cracked window panes or correcting a failed new render can quickly outweigh the cost of expert removal.
At DecoRenders, we assess the existing surface and the wall beneath before recommending whether removal, repair or a new render system is the right route. Careful preparation is what gives a finished exterior its clean appearance and its staying power.
If the old pebbledash is failing, treat its removal as the first stage of improving the property, not a demolition job to rush through. A careful decision now gives the wall the best chance of staying dry, sound and smart for years to come.
Recent Comments